


You're standing in the tack room mirror with a pile of unfamiliar pieces at your feet. The breeches look right, the shirt is tucked in, and the boots are finally on, but you're still wondering whether the jacket belongs at a lesson, whether the helmet is sitting correctly, and why the outfit feels comfortable upright but restrictive in the saddle. An English riding outfit should look polished, but every piece also needs to work while you mount, steer, post, jump, and spend time around the horse.
The easiest way to build one is to start with function, then refine the appearance. Fit, safety certification, movement, weather, and discipline matter more than copying a single competition image. Once those decisions are clear, the classic English silhouette becomes much easier to create.
Table of Contents
- What an English Riding Outfit Actually Includes
- Where the English Look Comes From
- The Core Garments and What Each One Does
- How to Fit Each Piece for Real Riding
- Helmets and Body Protectors as Non-Negotiables
- Outfit Formulas for Lesson, Hacking, Show, and Cross-Country
- Layering for Climate and Caring for Your Kit
What an English Riding Outfit Actually Includes
You check yourself in the mirror before walking to the arena. Breeches cover your legs with a close fit and may have knee patches or a full-seat grip. A moisture-managing base layer sits next to your skin, while a riding shirt adds structure or a competition-ready collar. A jacket, sweater, or vest provides warmth and finish. Tall boots support the lower leg and help maintain a consistent heel position. The certified helmet is the protective foundation, not a decorative finishing touch.
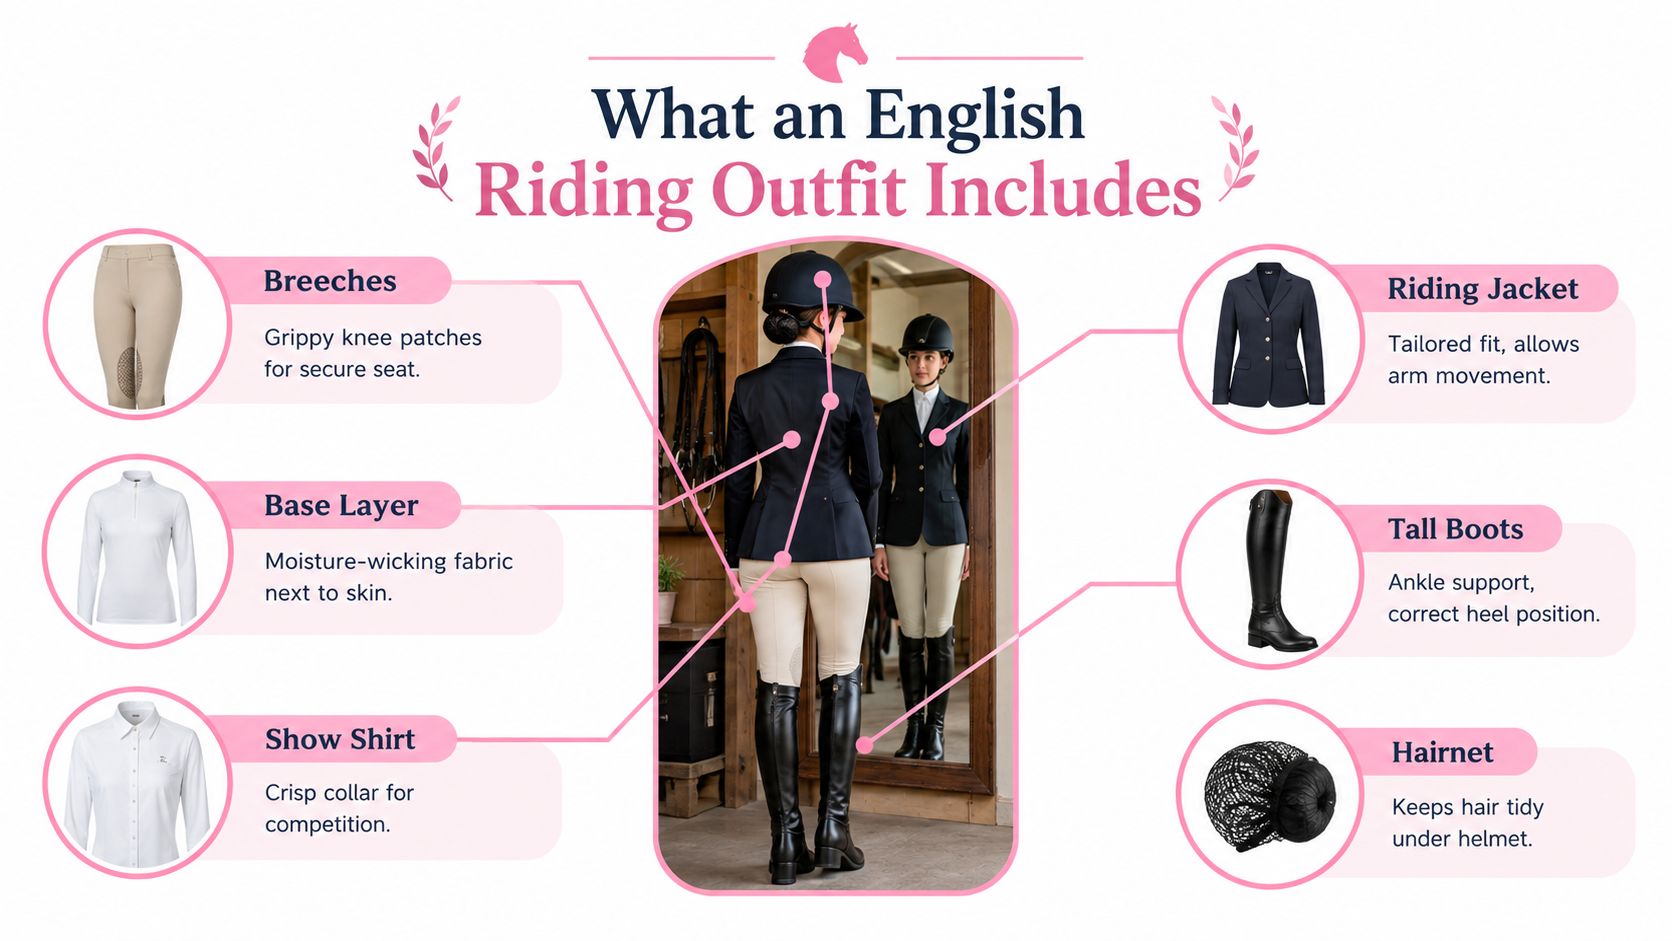
Start with the job of each layer
Think of the outfit as a system that follows your body from the skin outward.
- Base layer: Moves moisture away from the skin and reduces bulk beneath other garments.
- Shirt: Gives you a clean, practical top for lessons or a crisp foundation beneath a show coat.
- Breeches: Allow hip and knee movement while helping you stay stable in the saddle.
- Jacket or mid-layer: Adds warmth, weather protection, or formal presentation without restricting the shoulders.
- Boots: Keep the foot secure in the stirrup and create a smooth lower-leg line.
- Helmet: Protects your head when correctly certified, fitted, and secured.
Gloves and a hairnet often complete the working outfit. Gloves can improve comfort and grip on the reins, while a hairnet keeps loose hair controlled under the helmet. A belt may be useful if it sits flat and doesn't press into your waist when seated.
The right combination depends on what you're doing. A first lesson doesn't require the same formal layers as a show, and a cross-country school may require protective equipment that a quiet arena session doesn't. Later sections will help you test fit, choose safety gear, adapt the outfit to different activities, and build layers for changing weather.
Where the English Look Comes From
The modern English riding outfit grew from the nineteenth-century riding habit, a specialized garment that combined the practical demands of riding with the fashion of its period. The Victoria and Albert Museum's record of a riding habit describes it as an elite sporting garment that also served practical purposes for walking and travel.
That dual role explains much of the look we recognize today. Riding clothing had to allow movement, withstand outdoor use, and present the wearer attractively in public. Fitted waists and changing sleeve shapes influenced women's fashionable dress across Europe and European empires. Riding was not isolated from everyday style. It helped shape it.
From status clothing to activewear
By the 1890s, riding attire had developed into functional fitted costumes worn by women across different levels of society, rather than remaining exclusively associated with an elite. Riders also wore these garments beyond countryside activity, including in prominent urban settings such as Hyde Park in London and the Bois de Boulogne in Paris.
The transition left a lasting design language. A structured jacket suggests order and polish. A fitted breech keeps fabric from bunching around the saddle. Tall boots create a clean line and protect the lower leg. Even a practical shirt often includes a collar because the English tradition values a finished appearance as well as mobility.
Style principle: The classic look works because it balances freedom of movement, durability, social presentation, and a tailored silhouette.
Modern fabrics have changed what the garments can do, but they haven't erased that visual heritage. Stretch materials, technical linings, breathable panels, and grip details now support the rider's movement while preserving the recognizable outline. That's why English riding apparel doesn't usually look like generic gymwear, even when it performs like technical sports clothing.
The history also helps explain why a polished outfit isn't automatically a safe one. Traditional appearance may guide the jacket, shirt, and boots, but certified protective equipment must guide the helmet and body protector choices.
The Core Garments and What Each One Does
A rider can look correctly dressed and still be uncomfortable because one garment is doing the wrong job. Start with the pieces that contact the horse and saddle, then add the layers that affect temperature and presentation.
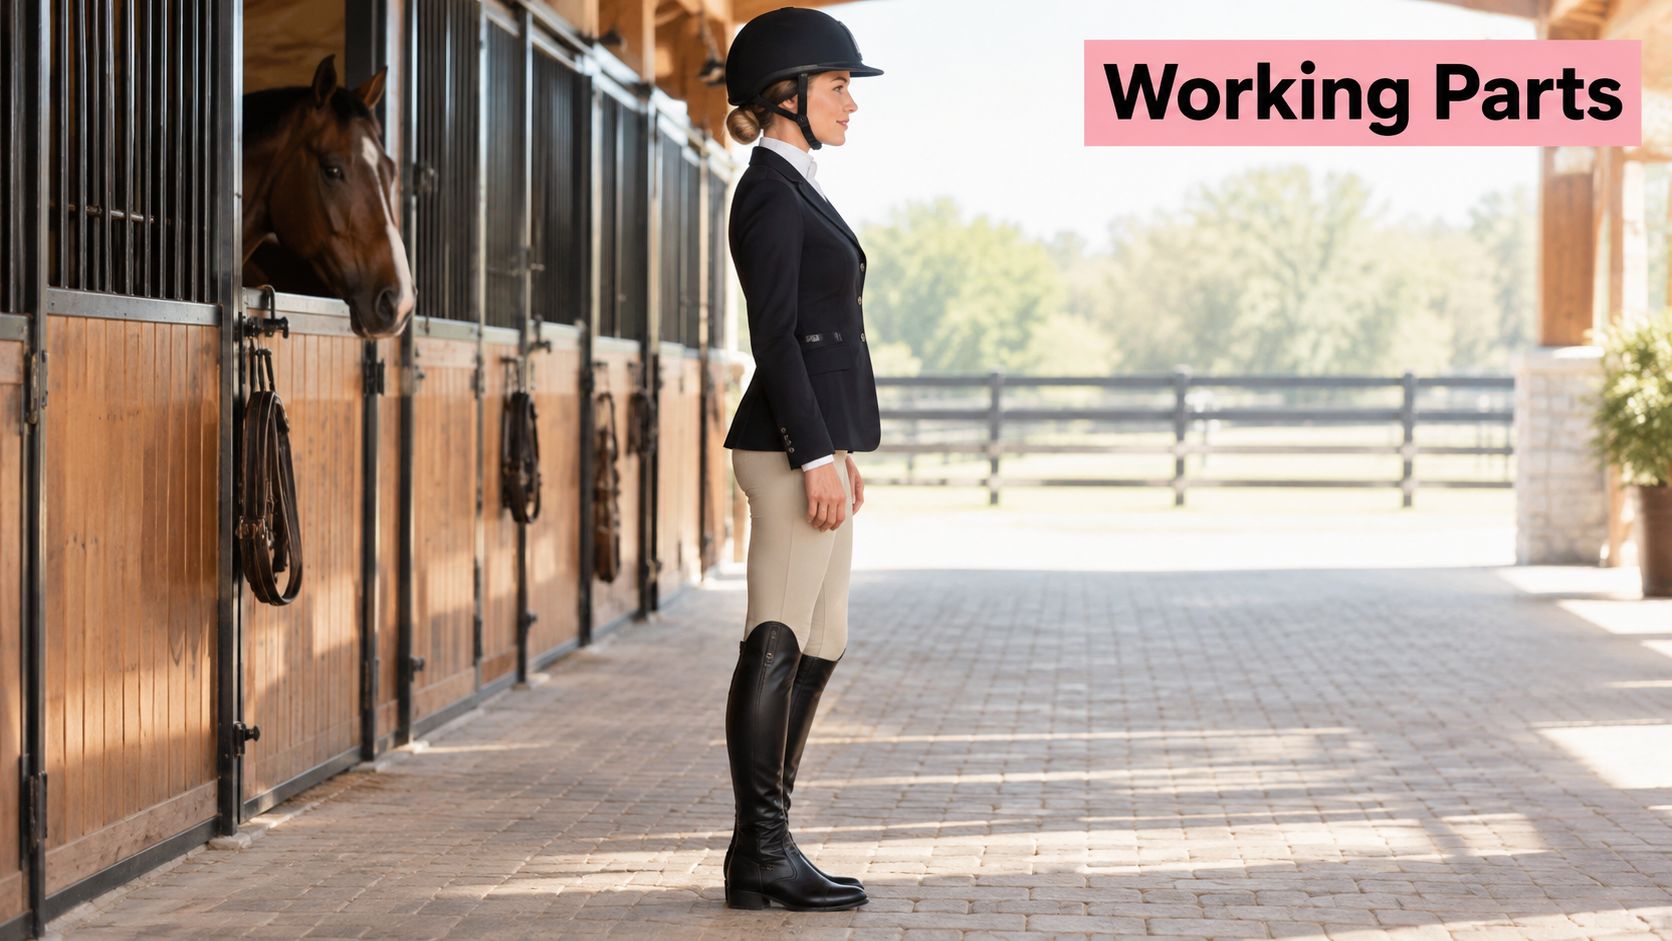
Breeches establish your contact with the saddle
Breeches should flex at the hip and knee without pulling across the front of the waist. Knee-patch grip places traction beneath the rider's knees, which suits many schooling situations and can feel less restrictive when you move between the saddle and the ground. Full-seat grip extends across the seat and may provide a more secure feel for riders who want additional stability during dressage work, jumping, or frequent transitions.
Grip isn't a substitute for balance or correct riding. It should also stay in the intended position when you bend your knee. A panel that sits below your actual knee can interfere rather than help.
Shirts and base layers manage comfort
A base layer should lie smoothly beneath your shirt or jacket. Look for a documented fiber composition, useful stretch, and a cut that doesn't bunch beneath the waistband. A schooling shirt can be simple and practical. A show shirt may have a crisp collar designed to sit beneath a competition jacket or accommodate a stock tie, depending on the discipline and applicable rules.
For more ideas about choosing a practical wardrobe, use this guide to riding clothes for women as a starting point, then compare each item against your own climate and riding schedule.
Jackets, gloves, and hair control finish the system
A riding jacket should follow the shape of your shoulders without trapping your arms when they reach forward. A show coat has a more formal role, while a schooling jacket or sweater can prioritize warmth and easy washing. Gloves should let you close your fingers around the reins without excess fabric at the fingertips.
A hairnet or another secure hair solution prevents loose strands from distracting you and helps create a tidy outline under the helmet. It must not change the helmet's fit. Try the complete head arrangement together, rather than choosing a hairstyle and helmet separately.
A visual example can help you compare how formal garments, boots, and stable-ready layers work together:
How to Fit Each Piece for Real Riding
A standing fit can be misleading. Breeches may feel smooth in front of a mirror but cut into your waist once your hips flex, and a jacket may look neat until your arms reach toward the reins. Test every important garment in a riding posture before deciding.
Use this six-step fitting protocol
- Start with measurements. Take garment measurements instead of relying only on a generic small, medium, or large label. Check waist, hip, inseam, sleeve, calf, and boot measurements where relevant.
- Wear your real base layers. Try breeches with the underwear and base layer you expect to use. Test a jacket over the shirt or sweater that will sit beneath it.
- Sit like a rider. Bend your hips and knees as if you're in the saddle. Check whether the waistband stays stable, the rise remains comfortable, and the fabric still covers you without pulling.
- Inspect contact points. Look at knee or full-seat grip placement, pocket edges, inner-leg seams, boot openings, and areas that may rub beneath a body protector. The knee patch should meet your actual knee when your leg is bent, not when you're standing straight.
- Rehearse the movements. Simulate mounting, dismounting, bending, repeated leg movement, and a two-point position. Reach your arms forward and rotate your shoulders. A jacket that restricts this movement won't become better once you're carrying reins.
- Check the fabric after stretching. Inspect opacity, seam strain, and recovery. “Four-way stretch” describes a direction of movement, not necessarily how well fabric recovers, resists abrasion, manages moisture, or remains opaque. “Water resistant” also isn't the same as waterproof.
The women's breeches fitting guide can help you think through cut and purpose, but your own riding posture remains the final test. A garment that feels slightly relaxed while standing may be the better choice if it lies correctly when seated, provided it doesn't shift or create excess fabric.
Practical rule: Buy for the position you ride in, not the position you stand in.
Also check compatibility with winter layers and a body protector. A base garment that fits alone may become restrictive beneath a vest, while a jacket that works over a shirt may not accommodate an insulating mid-layer.
Helmets and Body Protectors as Non-Negotiables
The helmet is the primary technical component of an English riding outfit. Its color, finish, and visor can support your preferred look, but those details come after certification, fit, and stability.
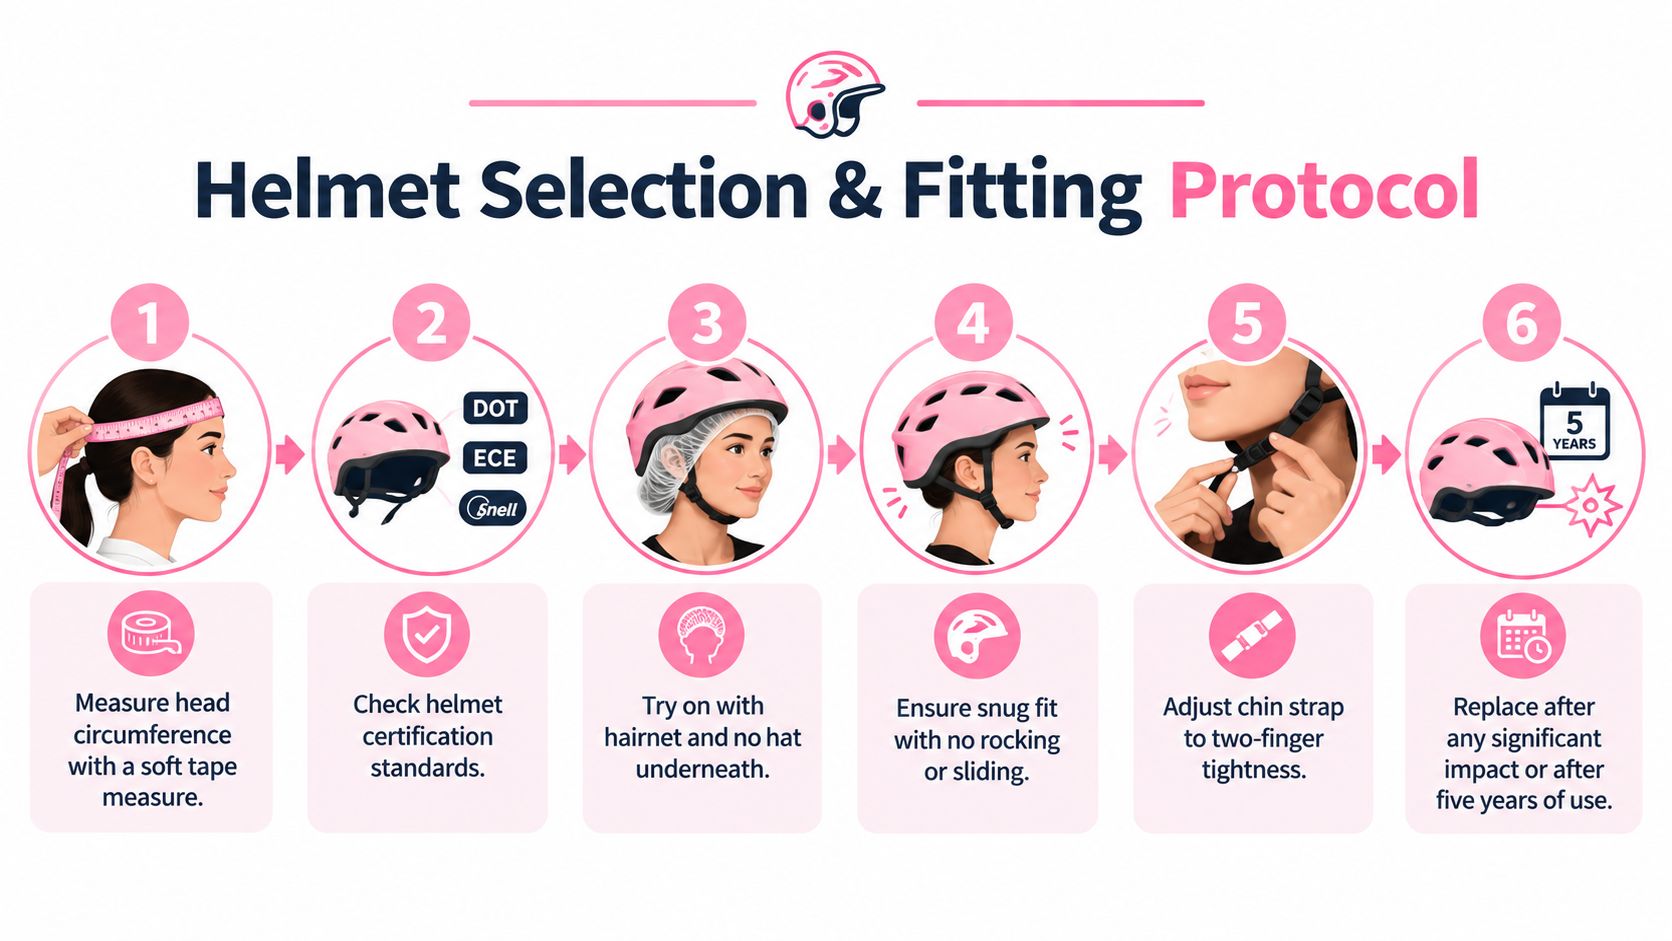
A practical helmet protocol is straightforward:
- Choose the correct certification. Select an equestrian helmet carrying current ASTM F1163 and SEI certification. A bicycle helmet or fashion hat isn't an acceptable substitute.
- Measure your head. Follow the manufacturer's method and measure the circumference accurately.
- Test your normal hairstyle. Arrange your hair as you'll wear it while riding. Don't create extra space for a hairstyle you won't use.
- Check contact and movement. The helmet should feel evenly snug, without pressure points, rocking, or sliding when you look down or turn your head.
- Secure the chinstrap. Adjust it so the helmet remains stable during mounting, dismounting, and a forward-seat position.
- Replace when necessary. Replace the helmet after a significant impact and follow the manufacturer's service guidance.
Approved helmets have been associated with a 30% reduction in riding-related head injuries and a 50% reduction in severe head injuries, according to Utah State University Extension's helmet guidance. A separate youth-organization intervention reported a 60% decrease in head injuries after requiring approved helmets while mounted, so the equipment decision deserves more attention than its appearance.
Add protection according to the activity
A body protector can reduce injuries from falls, kicks, and other horse-related impacts. The British Horse Society's body protector guidance recommends Level 3 protectors because they provide the highest protection and meet the requirements of any equestrian discipline.
Rules vary by organization and country, so check the applicable rulebook rather than assuming one standard works everywhere. Ireland's rules state that VG1 will no longer be accepted as an approved helmet standard from June 1, 2025, which shows why riders need current local information.
The safest-looking outfit isn't always the safest outfit. A slim jacket, low-profile boot, or decorative hat can't replace certified protective gear. Ask your riding school, trainer, governing body, or event organizer which equipment is required and which items are recommended for your activity.
Outfit Formulas for Lesson, Hacking, Show, and Cross-Country
The foundation stays familiar, but the outer layers and protection change with the work. A useful way to shop is to build one dependable base outfit, then add the pieces that match the setting.
For a lesson, choose fitted breeches, a comfortable base layer and shirt, gloves, correct boots, and a certified helmet. Add a sweater or light jacket if the arena is cool. Keep the clothing close enough to avoid catching on tack, but flexible enough for mounting and repeated leg movement.
For hacking, prioritize weather protection and comfort over formal presentation. A durable outer layer, gloves appropriate to the temperature, and boots suited to the footing may matter more than a show coat. Keep the helmet secure, and use a body protector if your instructor, route, or local guidance calls for one.
A show outfit follows the rules of the discipline and event. The same breeches and helmet foundation may be paired with a show shirt, formal jacket, stock tie, gloves, and tidy hair control. Don't buy every formal accessory before checking the current rulebook.
For cross-country, protection and durability take priority. A body protector may be required, and the outer layer must work over it without restricting breathing or arm movement. Footwear, gloves, and clothing should remain secure during faster movement and changing terrain.
| Context | Jacket | Breeches | Helmet & Protection | Boots |
|---|---|---|---|---|
| Lesson | Schooling shirt, sweater, or light jacket | Knee-patch or full-seat, based on preference and discipline | Certified helmet, body protector according to instruction or risk | Paddock boots with half chaps or tall boots |
| Hacking | Weather-resistant outer layer | Durable breeches with room for movement | Certified helmet, added protection when appropriate | Secure boots suited to the route and conditions |
| Show | Discipline-appropriate show coat | Conservative competition breeches | Certified helmet, required protection and formal accessories | Correct tall boots or approved competition footwear |
| Cross-country | Flexible shell or protective layer | Durable, secure breeches | Certified helmet and body protector when required | Boots or footwear permitted by the event rules |
If you're preparing product visuals or comparing how different garments might look together, an AI clothing model generator can help visualize outfit combinations. Treat that preview as a styling aid, not proof that a garment will fit or perform in the saddle.
Layering for Climate and Caring for Your Kit
A good layering system lets one English riding outfit adapt to a cool morning, a warmer afternoon, and a sudden change in weather. The trick is to add warmth without changing how your helmet, body protector, reins, or boots fit.
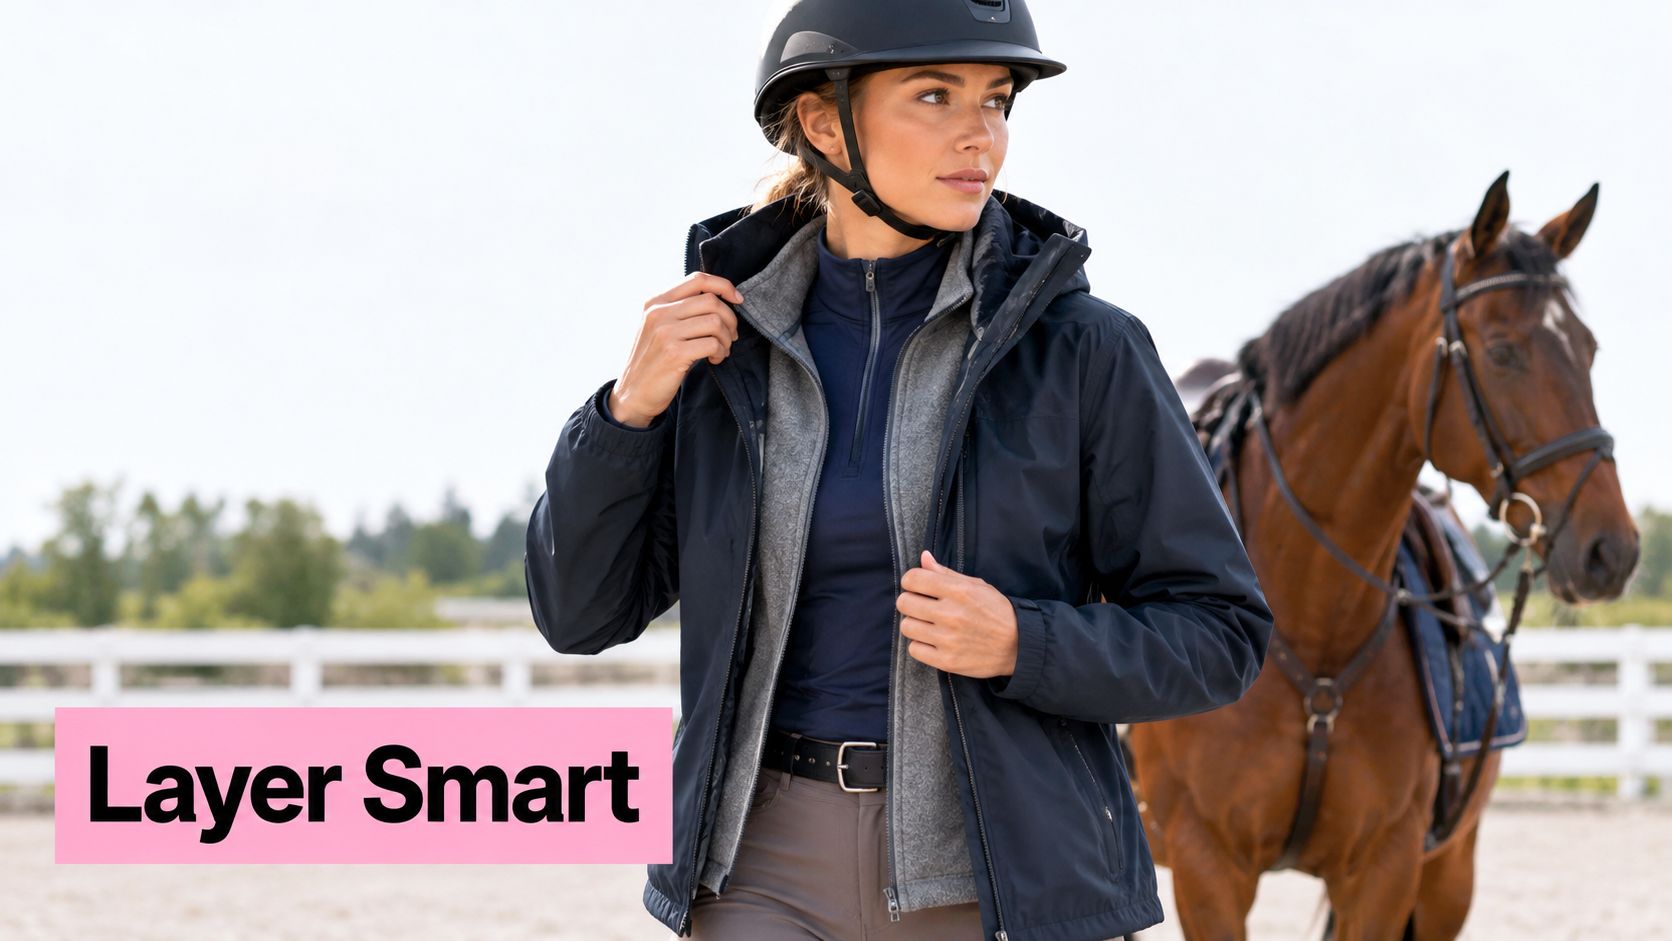
Build from the skin outward
In warm conditions, begin with a moisture-wicking base layer and a light riding shirt. Choose a close fit that dries efficiently and doesn't twist under the waistband. Breathable fabric helps only when the cut and seams also work for your posture, and a technical label alone doesn't guarantee comfort.
Cold-weather dressing works best with a thin base layer, an insulating mid-layer, and an outer shell that blocks wind or rain. Avoid a bulky sweater that presses beneath the front of a jacket or changes the way your arms reach forward. A stretch vest can add warmth across the torso while leaving the shoulders free.
Wet weather demands careful language. A water-resistant garment may shed light rain without being fully waterproof, so check the product description and construction before relying on it for prolonged exposure. Hood placement also matters. A loose hood can catch or obstruct movement, while a tight hood may interfere with helmet fit.
Layering changes safety equipment too. Try the helmet with the hair arrangement you will use, not with bulky fabric underneath. Put the body protector over the layers you intend to wear, then mount, bend, and reach forward. If the protector shifts or the jacket compresses your breathing space, change the layers rather than ignoring the problem.
Wash and store every piece according to its job
Technical garments need different care from leather boots. Read the care label, close fasteners before washing, and avoid treating every performance fabric like ordinary cotton. Heat, harsh detergents, and fabric softener can affect stretch, finishes, or moisture management. These practical fabric care tips from More Sewing offer a useful reference when you're unsure how to handle a particular textile.
Rain shells may need reproofing after regular use. Don't assume a jacket remains weather-resistant forever just because it carried that label when new. Let garments dry fully before storing them, and keep dirty riding clothes separate from clean show pieces.
Leather tall boots benefit from cleaning, conditioning, and storage that preserves their shape. Use boot trees where appropriate, allow damp leather to dry naturally, and avoid placing boots against a direct heat source. Keep gloves dry and inspect seams, grip panels, and fasteners before the next ride.
A jacket's fit can also change your presentation. For ideas on selecting the right outer layer, compare this guide to an English riding jacket, then test the garment over your actual shirt and protective equipment.
Keep a phone-ready checklist
- Certified helmet: Confirm current requirements, secure fit, and intact construction.
- Body protector: Wear one where the activity, instructor, or rules require or recommend it.
- Fitted breeches: Check the waistband, rise, grip placement, seams, and opacity while seated.
- Base layer and shirt: Choose materials and collars suited to the weather and discipline.
- Outer layer: Match a jacket, sweater, vest, or shell to movement and conditions.
- Correct boots: Confirm secure footing, suitable heel position, and compatibility with the stirrups.
- Gloves: Choose a pair that allows rein contact without bunching.
- Hairnet or hair control: Use it where needed, without changing helmet fit.
- Care routine: Wash technical fabrics properly, maintain leather, and store garments dry.
- Safety schedule: Replace protective equipment according to impact history and manufacturer guidance.
Three habits make the biggest difference over time: fit garments in a riding posture, replace safety gear on the manufacturer's schedule, and care for technical fabrics and leather according to their construction. Those habits matter more than adding another decorative detail to the outfit.
Bridle Up Hope Shop offers English riding attire alongside horse-themed apparel, accessories, gifts, and items for women and children. Visit Bridle Up Hope Shop to compare riding shirts, leggings, socks, boots, and belts while supporting a shop whose annual net profits are donated to the Bridle Up Hope foundation.
Leave a comment